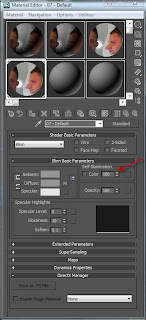
next we needed to import the image into 3ds max. we had to create a plain with one polygon. we then went to materials and added the materal of our face with the lines on it. you can either save the image you one in photoshop are a jpeg of you can import the file saved from photoshop. i also found out that when importing the image 3ds max distorted the image to get around this i had to go to customize- preferences- view ports- configure driver then on background texture size tick match bitmap size as closely as possible and on downloaded texture size tick match bit map size as closely are possible. once you have done that click OK and reapply the material again. You may need to do this every time you open up this file.
once this is done to make sure your plain does not get a shadow on it when you turn the image you need to go to materials and change the colour to 100%

once you have done that you then need to fit the bitmap to the plain. to do this you need to go on the modifier list - uvw maps and the on that screen click on bitmap fit, this will then make the bitmap to its saved size. once that is done click ont uvm mapping and then click on Gizom this will alow you to move the image on the plain, move the image in to the centre of the plain. once you have done that use the rotate tool home down shift and move the image 90 degreas this will copy the image. then use the modifier gizom to move the image to the side of the face
you then need to freeze off the plains to do this you need to select the plain click on object
properties tick the freeze and untick show frozen objects in grey and do the same for the other one.


No comments:
Post a Comment