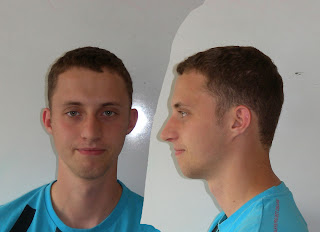
the first stage was to take pictures of our faces from the front and side view. then we had to import these images in to photoshop and align these images up. we did this by clicking on filter-distort-lens correction. once we was in this part of the program we drew a straight line from the centre of the right eye to the centre of the left eye this then made the face more central. we then imported the side view of the face in to photoshop and aligned it up with the front view of the face. you can do this by setting the opacity to 68% so you can see through the side face but can still see the side face, using the free transformation and moving the center point to the mouth and then you can rotate the face until the eyes ears and nose are all in Aline with the front image. you can check this by using the ruler tool.

the next stage was to identify the creases in the face and highlight these with a blue paint brush
once that is done you can then add red lines in which will act as the polygons of your face to use in 3ds max.


No comments:
Post a Comment