Wednesday, 29 September 2010

modeling the face stage 3

next we needed to import the image into 3ds max. we had to create a plain with one polygon. we then went to materials and added the materal of our face with the lines on it. you can either save the image you one in photoshop are a jpeg of you can import the file saved from photoshop. i also found out that when importing the image 3ds max distorted the image to get around this i had to go to customize- preferences- view ports- configure driver then on background texture size tick match bitmap size as closely as possible and on downloaded texture size tick match bit map size as closely are possible. once you have done that click OK and reapply the material again. You may need to do this every time you open up this file.


once this is done to make sure your plain does not get a shadow on it when you turn the image you need to go to materials and change the colour to 100%
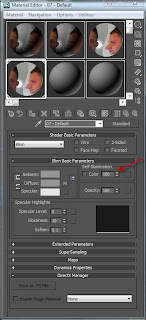


once you have done that you then need to fit the bitmap to the plain. to do this you need to go on the modifier list - uvw maps and the on that screen click on bitmap fit, this will then make the bitmap to its saved size. once that is done click ont uvm mapping and then click on Gizom this will alow you to move the image on the plain, move the image in to the centre of the plain. once you have done that use the rotate tool home down shift and move the image 90 degreas this will copy the image. then use the modifier gizom to move the image to the side of the face


you then need to freeze off the plains to do this you need to select the plain click on object
properties tick the freeze and untick show frozen objects in grey and do the same for the other one.

modeling the face stages 1 to 2

to model the face we are using videos as prompts from Richard barns blog this will show us the stages that we have to go through to create our face in 3ds max.


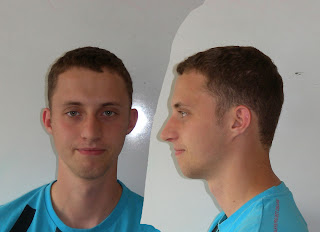
the first stage was to take pictures of our faces from the front and side view. then we had to import these images in to photoshop and align these images up. we did this by clicking on filter-distort-lens correction. once we was in this part of the program we drew a straight line from the centre of the right eye to the centre of the left eye this then made the face more central. we then imported the side view of the face in to photoshop and aligned it up with the front view of the face. you can do this by setting the opacity to 68% so you can see through the side face but can still see the side face, using the free transformation and moving the center point to the mouth and then you can rotate the face until the eyes ears and nose are all in Aline with the front image. you can check this by using the ruler tool.


the next stage was to identify the creases in the face and highlight these with a blue paint brush

once that is done you can then add red lines in which will act as the polygons of your face to use in 3ds max.
then we did the same stage with the red and blue lines for the side face.

Thursday, 23 September 2010

reaction to the brief

this year we was given two briefs the first brief is to create a 3d image of our face in 3ds max s using splines and the 2nd brief was to use animations about a chosen of Essex that is close to our hearts in a way of promoting Essex

i am looking forward in moulding my head in 3ds max i think this will be a good challenge but i think this is going to take up alot of my time as we don't have long to do it in.

promoting Essex is going to be easier for me as i have lived in Essex for all of my life and working in a group will be good knowing that the group i am in will work hard.