Thursday, 21 October 2010

stage 9 b


once you have mapped out one side you then need to go on the modifier list above symmetry and pick on the modifier list unwrap uvw then click on face and edit then have pick element selected select the mirrored side and mirror it over on the uvw map, do the same for this for the ear. once that is done you then need to weld the seams together. by selecting the vertex and using ctrl w to weld then.


now you can see both sides are mapped.


you then need to render the mesh and save it as a tiff.
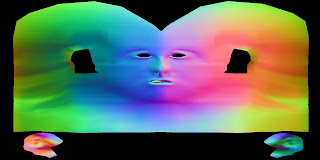


rendered mesh showing no over lapping faces.

stage 9 a


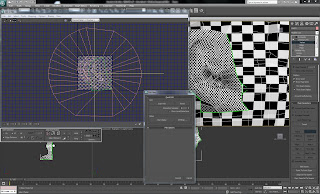
first we applied a checked patten. we went down in the modifier list and clicked on uvw mapping unwrap then selected the whole face but not not ear. then click on edit on the right hand side. the idea was to create the same size checked squares on the face. i did this by using the relax tool. you can relax by centre, angle or by face., the relax by centers i used on the nose and the mough and the relax by angle i used on the top of the head.


creating uvw map for the ear you needed to use pelt before doing this you need to select the ear, you need to create a point to point seam, to do this click on point to point seam and pick a point from behind the ear and point on the front of the ear, you need to make sure you click the point that is in align with the one that you select first. Then click plain making sure the plain is on the ear, click fit and then click pelt., the start pelt and this will unwrap the ear out and map it for you.


finish map as you can see the squares as the same size.

stage 8


creating the ear we painted the lines on in photoshop then imported the image over to 3ds max and created the polygons like we did to the face.


then made one of then converted one to an editable poly and attached the rest.


then started moving them around to create the indents to the ear.


finished ear smoothed.

Wednesday, 20 October 2010

stage 7


creating the back of the head, i created a sphere created the same amound of polygones in it and thenjoined them to the face by using th e snap tool.


i then held down shift copying the polygones to create the shoulders and shape it to the image.


i then attacked the back of the head to the frount.

Friday, 15 October 2010

stage 6

stage 6 we needed to close the gap in the mouth and the nose, i did this by selecting the edges of the polygons around the nose, hold down shift to copy and drag them out, joining up the edges using the weld tool to connect the points together. once i created the outline of the inner nostril, i then created a polygon to represent the inside of the nostril and the extruded it up into the face not to far just enough to create the illusion to look right. i used these steps again to create the lips.


as you can see in this image with the lips and nostrills extroded i then moved the vertix's around to try and get the best fit.


moudling the face stage 5

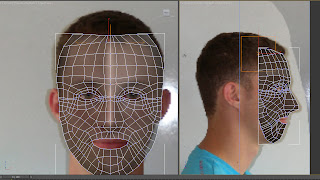
on stage 5 i then needed to make the mesh that i created 3d so i went to the left view and started dragging out the vertex's only using the x axis i found it much easier selecting the vertex's on the front view so i could then see where they had to go. and also making the mesh see through i did this by right clicking selecting object properties and ticking the box see through.

moudling the face stage 4

once the image was in 3ds max i then needed to create polygons using the line tool. making sure snap was on so i could then make sure the polygons were connected. once i had drawn all the polygons tracing the image, I then needed to right click on one of the polygons and go to convert to editable poly. i then needed to attach the other polygons i did this by clicking attach on the tool bar and then selecting the other polygons,


once this was done i ended out with a mesh.